Thursday, March 9, 2017

Stuffed Mushroom Bread


Carbs. Who doesn't love carbs? I mean, really? I would be so much better at doing a carb-only diet rather than a low-carb diet. Why doesn't that exist? Why can't they invent that? 

Give me all the carbs!


Whenever hubby and I do decide to cut carbs from our diet, it's bread that keeps calling to me and haunting my dreams. Warm, crusty, buttery bread. We've always had a very strong connection and we've always seen eye-to-eye. Bread just gets me. 

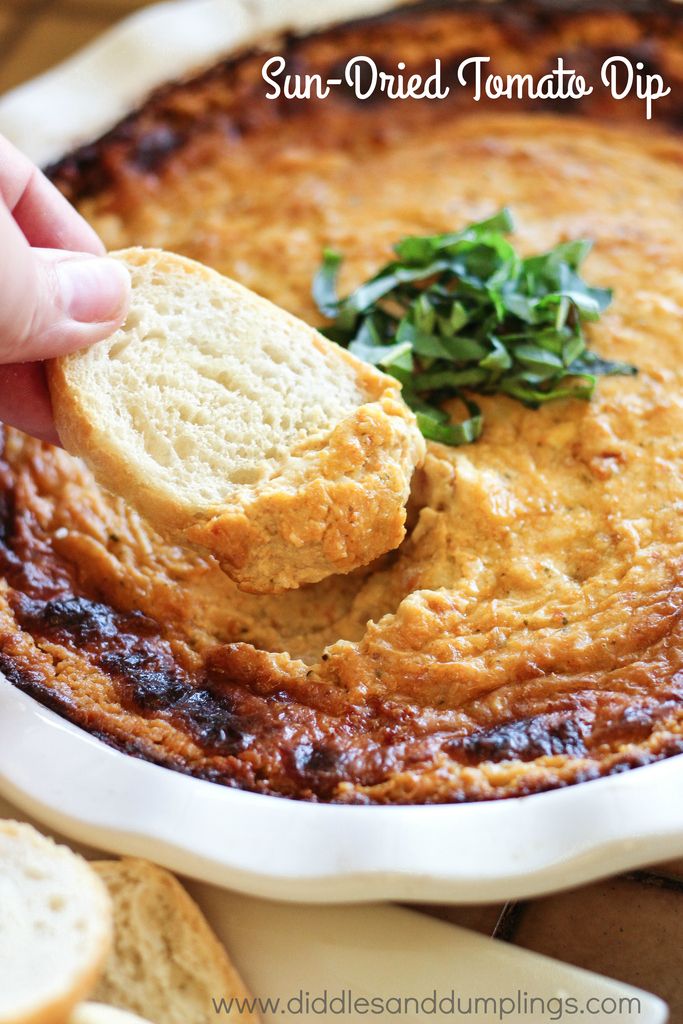
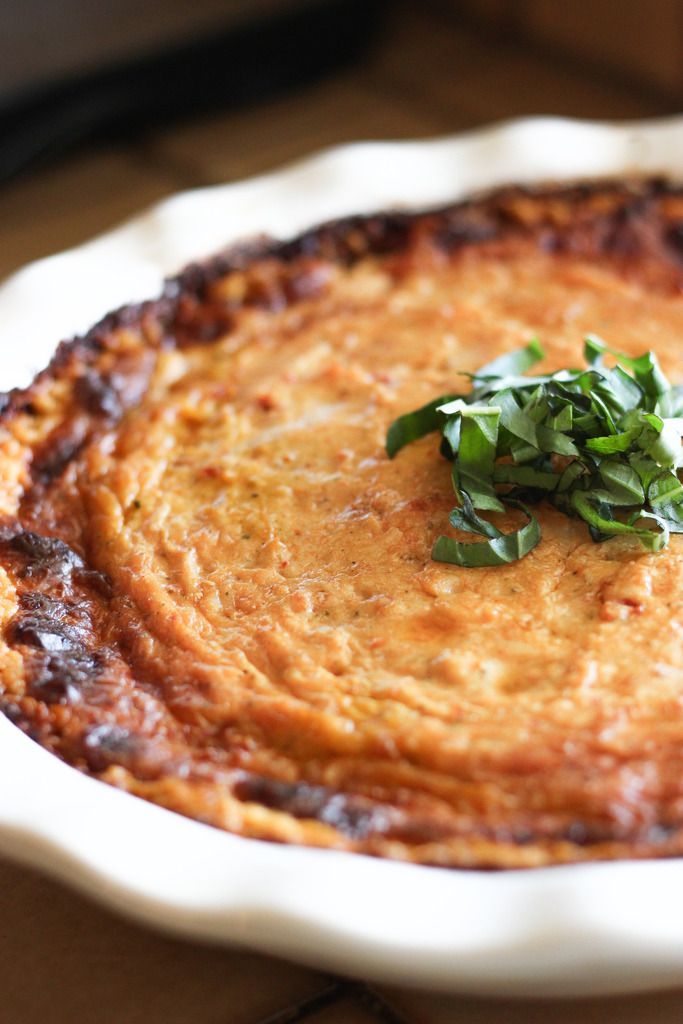
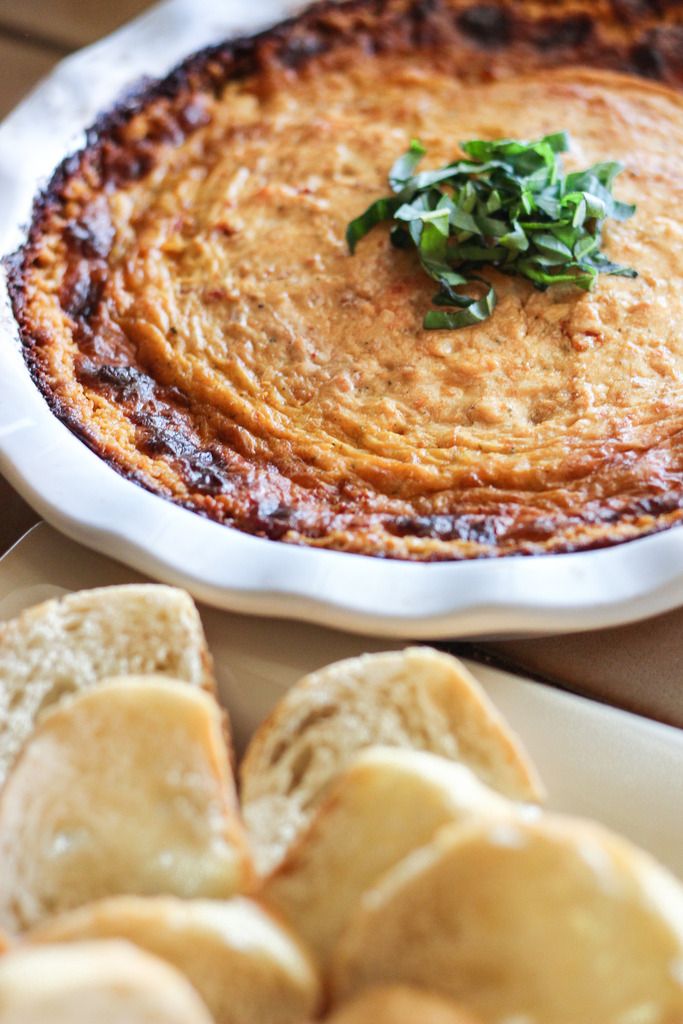
Know what the only thing better than bread is? Bread covered in ooey gooey cheese. It's true. It's a fact. And if you're a lover of stuffed mushrooms, you know, the ones filled with the most delicious garlicy, cheesy goodness, then you're probably going to faint when you try this recipe. 

Don't say I didn't warn you.


Also... make sure to try it with your spaghetti. Dip it in the sauce, drop some noodles on top... and be prepared for greatness. Or, try the spread over some grilled meat for a low-carb option. Toss it in the broiler for a couple minutes to melt the cheese and enjoy! Or just eat it by the spoonful, if you'd like. There's no wrong way to devour this cheesy spread of goodness.

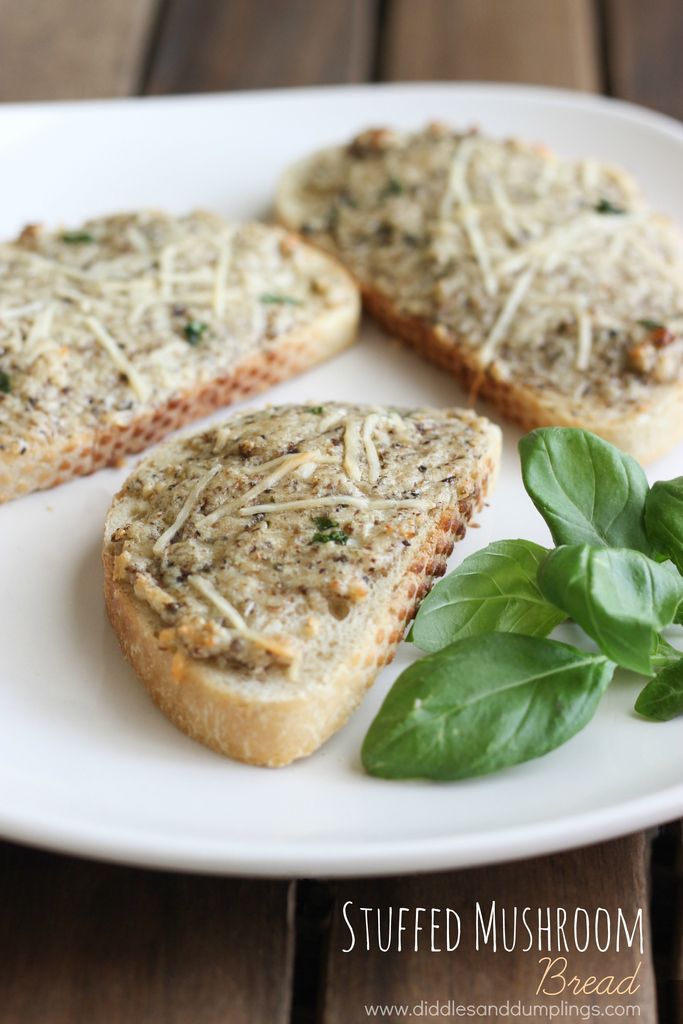
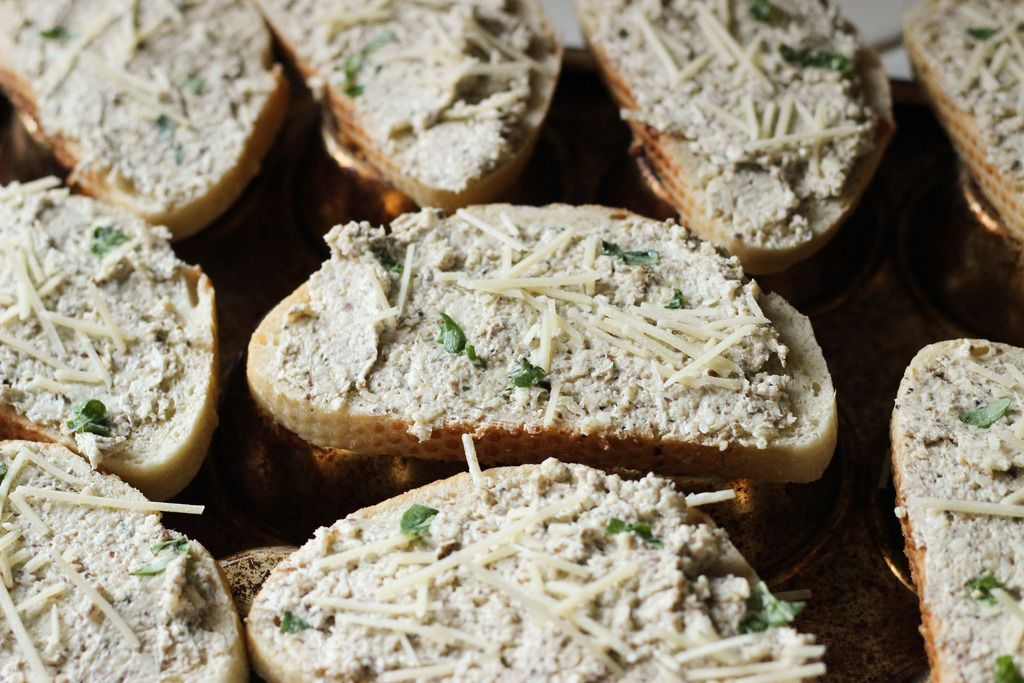
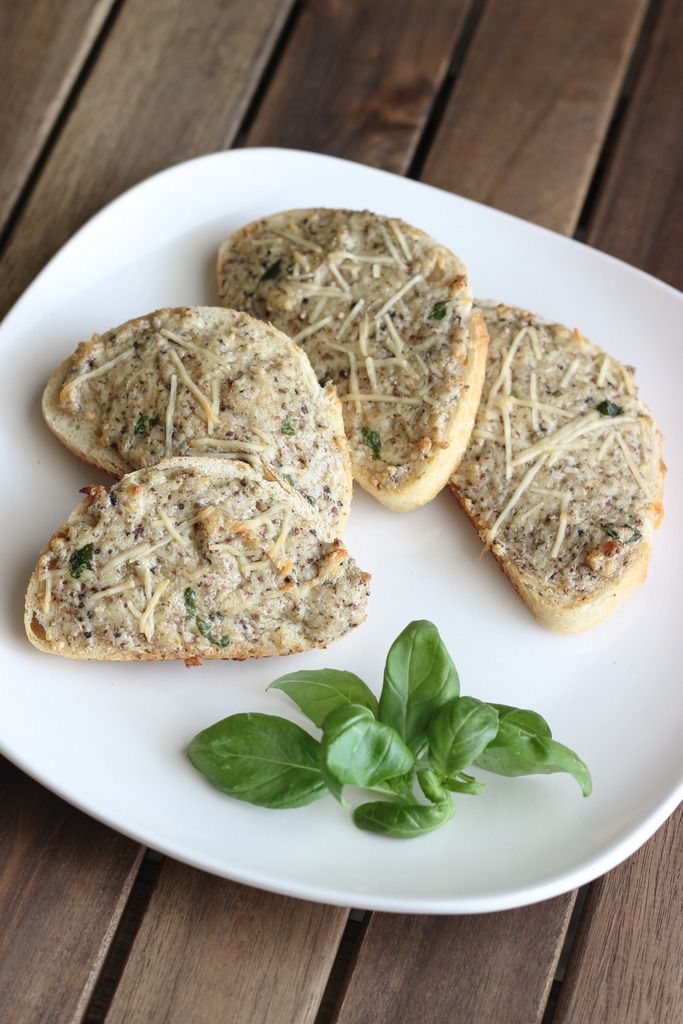
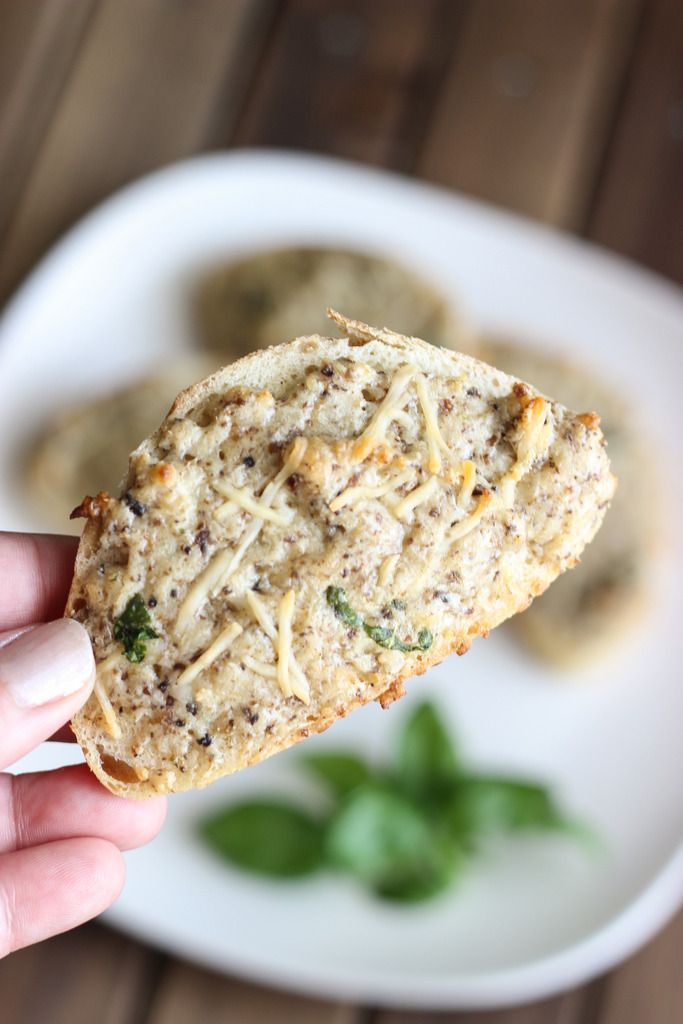
See those little brown flecks in the photo below? Those are mushroom bits. You're going to grow to love those adorable little brown speckles. 

Say hello to your new favorite way to eat a deconstructed stuffed mushroom!


Stuffed Mushroom Bread:

Ingredients:

1 small loaf Tuscan Bread - or any other crusty bread (mine was pre-sliced)
2 teaspoons olive oil
8oz container of sliced mushrooms
3 cloves garlic, minced
8oz cream cheese
2 tablespoons mayonnaise
2 tablespoons butter, room temperature
3/4 cup shredded mozzarella cheese
3/4 cup + 2 tablespoons shredded parmesan cheese
5 large basil leaves, torn

Directions:

Preheat oven to 325 degrees.

Place olive oil in a medium saucepan over medium heat. Toss in mushrooms and cook for about 15-20 minutes, or until mushrooms are a deep brown/golden brown color and starting to dry out just a little. Toss in garlic and cook for 1 minute longer. Remove from heat and set aside to cool slightly.

Pour mushrooms into food processor and pulse until they become very small chunks. Add in cream cheese, mayonnaise, butter, cheeses and basil and pulse until well combined. 

Spread mixture (about a tablespoon for small slices of bread, or 2 tablespoons for larger slices of bread) over your bread, sprinkle additional parmesan on top,  place on baking sheet and into oven for 18-20 minutes, or until bread is toasted and cheeses are melted and starting to turn golden. 

Remove from oven and serve immediately!


Wednesday, May 4, 2016

Peanut Butter Cheesecake Smoothie with Pretzel Crumble

his shop has been compensated by Collective Bias, Inc. and its advertiser. All opinions are mine alone. #MySmoothie #CollectiveBias

More than likely you've noticed that I've become quite the smoothie lover. I just can't seem to get enough of them and the fact that you have endless flavor combinations at your fingers just makes them so much more appealing. Smoothies can also be as healthy or as indulgent as you want, depending on how careful you're trying to be. For me, I like to use smoothies as a healthy breakfast option because they get me pumped for the day and give me right about of protein and energy I need to battle my 3-year-old and keep my kitchen clean {The kitchen of a food blogger isn't usually a pretty sight.}

Today I have yet another delicious smoothie to share with you, and I just know you're going to love it. As long as you're a fan of cheesecake (who isn't?) and peanut butter (again, who isn't?) then you'll love it. It might even become your new best friend. 


Any good smoothie begins with a trip to the store. Unless you just so happen to have every single ingredient you already need. Which you might... But, if you don't... A trip to Walmart can fix that.


Well, hello you smooth, creamy, luscious Jif™ Creamy Peanut Butter . And hello you creamy, sweet, Dannon Vanilla Lowfat Yogurt. I've grown up with Jif and we've become great pals over the years. Jif has been making my peanut butter sandwiches and cookies since I was a young girl and it continues to do so now even as a slightly older girl. 

Let's not forget Dannon yogurt. Dannon yogurt has been with me all along, too. My parfaits and my post-school snacks wouldn't have been the same without it. Here's to you, Dannon yogurt!

So, basically... I'm about to share with you an extremely delicious smoothie recipe that you're going to want for breakfast, snack, lunch, second snack and dinner. Oh, and dessert. And midnight snack. The smoothie itself is bursting with peanut buttery cheesecake goodness, but the sweet & salty pretzel crumble on the top is my favorite part. It gives that crunch that I love so much with my smoothies. So, give it a try and let me know what you think!

Also... If you're in the market for a new blender or if you don't own one currently, check out the Oster® Blend-N-Go® MyBlend® - You can just fill, blend & go!
There's also currently an Ibotta offer available where you can 
Get $1.50 cash back on the combination of Jif™ Peanut Powder and Oikos (Vanilla) Triple Zero Greek Yogurt or $1.50 back on the combination of Jif™ Creamy Peanut Butter and Dannon Vanilla Yogurt -- Who doesn't love to save money??

And tell me...
What's your favorite Smoothie flavor??


Peanut Butter Cheesecake Smoothie with 
Sweet & Salty Pretzel Crumble:

Ingredients:

For the crumble:
1/2 cup broken up pretzels
1 tablespoon rolled oats
pinch of salt
1 teaspoon coconut oil
1 teaspoon honey

For the smoothie:
1/2 cup Danon Lowfat Vanilla Yogurt
2 tablespoons Jif Creamy Peanut Butter
1/4 cup almond milk
1/2 banana
2 teaspoons vanilla
1 tablespoon Sugar-free Cheesecake flavored pudding mix
2 ounces Neufchatel Cheese
2 teaspoons honey
12 ice cubes
*Extra peanut butter to decorate your cup, if desired

Directions:

Preheat oven to 275 degrees.

Heat coconut oil and honey in a small, microwave-safe bowl for 20-30 seconds or until completely melted. Mix in pretzels, oats and salt and spread on a parchment paper-lined baking sheet. Place in the oven for 10-15 minutes or until oats are golden brown. Remove from oven and allow to cool.

In your blender, place yogurt, peanut butter, almond milk, banana, vanilla, Cheesecake pudding mix, Neufchatel cheese, honey and ice cubes. Blend until smooth and no chunks remain. 

Spread peanut butter on the inside of your cup or mason jar, if desired. Pour in your smoothie and top with a sprinkling of the pretzel crumble. Enjoy!

Makes 2 smoothies.

Friday, April 29, 2016

NUTTER BUTTER Cookie Mustache Pops + Mustache Party Ideas

This shop has been compensated by Collective Bias, Inc. and its advertiser. All opinions are mine alone. #NuttyForTheHolidays #CollectiveBias


Nowadays there are so many adorable party themes out there to choose from. One of my favorites has to be the "Mustache" theme, because it's super versatile. It can be for a boy's birthday, a fun get-together with friends, a more "grown-up" party, a baby shower... you name it, and this theme can probably work for it. 


The other day a bunch of adorable mustache-themed ideas kept flooding my mind and I love that I am able to share them with you so that you, too, can use them for your own parties!
While shopping at Walmart the other day and I grabbed some of the supplies I needed to make some super cute, easy Mustache Pops that can also be used as props and Mustache Cups that would be perfect for any mustache party. Get ready to be excited... 


NUTTER BUTTER cookies have been one of my favorite cookies since I was a child. Their peanut buttery goodness makes them one of my favorite sweet treats to snack on. Also, look at them... They're the perfect shape for mustaches! Why bake your own cookies when you have the perfect canvas for some adorable mustaches? They're pretty much the perfect cookie for almost any design you can think of! I love their versatility (pretty sure this is the word of the day.)


So, in just a few simple steps, you can make super adorable Mustache Pops and I'm going to show you how. First thing, grab some:
  • NUTTER BUTTER cookies 
  • long lollipop sticks
  • black chocolate melting wafers.

Next, use one of the sticks to poke a hole in the bottom (peanut butter part) of the NUTTER BUTTER cookies.


Dip your lollipop stick into your bowl of melted black chocolate wafers and place it in the pre-poked hole.


Allow the chocolate to harden, so the stick is secure. Then you can decorate! There are so many mustache options out there -- have fun with it!


Look how adorable they are! Seriously, could they be any cuter? I don't think so!


I also have a tutorial for some super cute, also super easy cups that will be a hit at the party:

DIY Mustache Cups Tutorial:

Supplies:
  • 1 piece of felt, found at craft stores. {it was smaller than a sheet of paper}
  • Scissors
  • Glue
  • Small plastic cups

Directions:

Step 1. Cut felt into small rectangles, about 2-1/2" x 1-1/4" Fold each rectangle in half and cut out your desired mustache shape.
Step 2.  Grab your glue, your mustaches and your cups.
Step 3. Apply a small drop of glue to the center of your mustache.
Step 4. Place it right under the "lip" of the cup and allow it to dry.


I thought milk would be perfect to serve in the cups -- milk, cookies, you know... the perfect combination? Also... Milk Mustaches. Get it? The milk has a mustache! It's hilarious. Isn't it? I know, Im cracking up, too.


My little guy with the cookie pops in action! These really are the perfect treat to make because, not only are they super delicious, but they double as an adorable prop to instantly give any person their very own mustache! Trust me, people want mustaches. And now they can have their own, and eat it, too!

{Click image to enlarge + print}

Because I care about you and your mustache party so much, I have also included a Mustache Matching game that you can print and have your guests play! Matching games aren't just for kids. Adults love them, too! Just print the image above (cardstock is best) cut out the squares and flip them over and let the matching begin!

I hope you'll use these ideas at your next Mustache Celebration and I hope you have as much fun making them as I did! Sometimes it's the simple, easy details of a party that really bring it all together and add that special "cuteness" factor! Have fun and happy celebrating!

Tuesday, April 26, 2016

Dark Chocolate Coconut Almond Crunch


The secret to a happy life, in my opinion, is chocolate. There are very few things that can give me the pure satisfaction that chocolate can. It can also take away any sadness or anger I may be feeling and instantly put me in a great mood. Pair that chocolate with some salty nuts and crunchy, buttery toffee and you've got yourself a winning combination. 

Now, throw a little toasted coconut on top and you've officially arrived. This is as good as it gets.


There's something really satisfying about chopping up chocolate. Give me a sharp knife and a big hunk of dark chocolate and I'll be a happy camper.


Hello, beautiful chocolate. Hi! You're so pretty. Yes you are.


Now, a sprinkling of pixie dust. I mean coconut. And now you have yourself the perfect little treat that will satisfy your sweet tooth. And your salty tooth, if that's a thing. Which it's not. But, it should be.

Enjoy! But try not to eat them all at once... Like I did. 


Dark Chocolate Almond Crunch:

Ingredients:
  • 1/3 cup white sugar
  • 2 tablespoons salted butter
  • 1 cup raw almonds
  • 1- 1/2 cups chopped dark chocolate
  • 1 tablespoon sea salt
  • 1 tablespoon unsweetened coconut


Directions:

Place a skillet over medium heat and heat almonds, while tossing for 1-2 minutes or until they're golden brown and smell nice and toasty. Set aside. Place coconut in the same pan and toss until golden brown, then remove from heat and set aside.

Place sugar and butter in a small saucepan over low heat. Once mixture melts, cook for 6-8 minutes, or until it's beginning to thicken and turn a rich caramel color. Quickly toss almonds to the pan and coat with mixture. Place tablespoons of the nut mixture on a baking sheet lined with parchment paper and allow to harden.

While nuts are cooling, melt chocolate over a double boiler until smooth and shiny. Spoon or drizzle chocolate over clusters and sprinkle with toasted coconut and sea salt. 

Makes about 16 clusters


Tuesday, March 22, 2016

"Pie in the Middle" Brownies

This shop has been compensated by Collective Bias, Inc. and its advertiser. All opinions are mine alone. #EasterMadeEasy#CollectiveBias


Is it just me, or does the sound of applause echoing through a stadium, fireworks exploding in the sky and millions of people chanting your name ring through your head when somebody tells you "this is the best thing i've ever tasted," when trying one of your dishes? It's affirmation that all the work, the mess, the buttery fingers, the flour-covered blouse and the trial and error that went into making a new recipe, was all worth it. Fortunately, with the recipe i'm about to share with all of you, there will be plenty of that.

For those of you who love to experiment in the kitchen and like your desserts not only delicious, but fun and creative, i've got something that's going to blow your minds. I've never seen it done before. At least, you can't find anything about it online. So, i'm kinda thinkin' we are gonna start a trend here! 


But, before we get started... any good recipe begins with good ingredients. While I was shopping for some groceries at my local Walmart, I grabbed everything I needed to take on this beast of a dessert, including an Edwards Georgia Style Pecan Pie! They're not just for the holidays, guys!


I couldn't help myself and I also picked up a Mrs. Smith's Dutch Apple Pie. It's one of my all-time favorites and I love having it in the freezer for a last-minute dessert if we have company. Plus, the crust is made with real butter. So, you know it has to be delicious. Oh, and before you go, head over to Ibotta site to get a rebate on Edwards and Mrs. Smith pies! Isn't this awesome? I told you! 


Oh, man do I love pecan pie.


The first step to a successful brownie creation is a greased and floured baking vessel. I'm using a springform pan for this one, to make it easier to remove later. This brownie is going to be a monster.


Do you see that? Yes... That's a pie. In the middle of a ton of brownie batter. Are you getting excited now?


You know what's the only thing that will make a giant brownie with a pie baked into the middle of it even more exciting? Some rich, silky chocolate ganache to pour over the top of it. Try not to drool too much. Just wait...


Okay, now you may drool! I call that perfection. Pie. Inside a brownie. Isn't it the most glorious thing you've ever laid your eyes on? The brownie is perfectly cooked, the pie is perfectly gooey and overall it's just perfectly perfect.


But now we take it up a notch. Look at that chocolate. This is dessert, only better. It's something that has to be in it's own category of awesome. Have you seen a pie baked into a brownie before? Better yet, have you tasted it? No? Well, you have to. It will change you.


It will also change your level of dessertness. You won't be able to bake a simple batch of brownies for the next potluck. You won't be able to serve your guests a chocolate chip cookie... You will want to bring this. And everyone will want to eat it. And they will eat it. And it will be glorious.

Tell me, guys... What's your favorite kind of pie??


"Pie in the Middle" Brownies:

Ingredients:
  • 1 cup butter, melted
  • 1 cup vegetable oil
  • 3-1/2 cups sugar
  • 8 eggs
  • 1 tablespoon vanilla extract
  • 1-1/3 cups all purpose flour
  • 1-3/4 cups cocoa powder
  • 3/4 teaspoons salt
  • 2 teaspoon baking powder
  • 1 Edwards Georgia Style Pecan Pie
For the ganache:

9 ounces semi-sweet chocolate chips
1 cup heavy cream


Directions:

Bake pie according to package directions. Allow pie to cool to room temp. 

Preheat oven to 325 degrees. Spray a 8" springform pan with baking spray, coat with a thin layer of flour and place on a baking sheet. Set aside.

Place melted butter in mixing bowl, cool slightly, then add in your sugar, eggs and vanilla. Mix for 30 seconds. In a separate bowl, combine flour, cocoa powder, salt and baking powder. Add to the wet ingredients and mix until combined, about 20 seconds on medium.

Pour half the batter into the springform pan. Place cooled pie on top of batter and lightly press down. Pour all but 1 cup of the remaining batter over the top of the pie. Refrigerate extra batter for later use, or bake and enjoy.  Place pan and baking sheet in preheated oven. Bake for 2 hours, then cover with foil and return to oven for another 30-60 minutes. Check every 10 minutes by inserting a toothpick into the top and checking for wet batter. Time does vary depending on your oven, so you will want to keep a close watch on this one. You'll know it's done when the toothpick has no gooey batter and when the top begins to puff and firm up.

Once the brownie is cooked through, remove from the oven and allow it to cool. I placed mine in the refrigerator overnight so it would firm up and be easier to cut the next day. I recommend at least putting it in the refrigerator for a couple of hours before slicing.

While the brownie cools, you can make your ganache. Heat the cream in a saucepan over medium heat. Just when it's starting to boil, remove it from heat and whisk it into the chocolate chips until they are smooth and completely melted. Allow ganache to cool down.

Once you're ready to serve, slice a piece of the brownie and top with a large spoonful of ganache, a dollop of ice cream and your choice of topping. Chocolate shavings, cherries, berries, anything your heart desires!

Enjoy!

Thursday, March 10, 2016

Quaker Oatmeal 2 Ways - Birthday Cake & Parmesan Chive

This shop has been compensated by Collective Bias, Inc. and its advertiser. All opinions are mine alone. #BringYourBestBowl #Walmart #CollectiveBias


You know what I love most about a warm, hearty bowl of oatmeal? How versatile it is. Oatmeal can be anything it wants to be or anything you want it to be, oatmeal doesn't conform or follow any rules. It can be as sweet or as savory as you'd like, as wet or as dry or even as warm or as cold. That's what I love so much about it. It's a staple in our home and our go-to breakfast choice most days of the week. Today I want to share with you a few of our favorite ways to jazz up our favorite breakfast food and maybe that will inspire you to create your own original oatmeal creation.


First, make sure you have the proper ingredients before you get started. My local Walmart has all the Quaker® oatmeal you could ever need. Look at that selection! 

So, before we get started with these delicious creations, I wanted to show you something that's been a big hit in my house. Customizable spoons. My daughter loves sparkly, cute things and she also loves washi tape and all other decorative tapes for that matter. We have found that it makes breakfast even more enjoyable when you have an adorable spoon to eat it with. So, here's a little tutorial to help you make the perfect breakfast utensil:

Sparkle Spoon Tutorial:

Materials: Scissors, spoon with plastic handle, decorative sparkle tape.

Step 1: Gather materials. Scissors, spoon with plastic handle and decorative sparkle tape.
Step 2: Cut tape to desired length. I like to leave a small part of the end visible, just because it's cute.
Step 3. Wrap one side of the tape over the backside of the spoon.
Step 4. Wrap remaining side of tape over the back of the spoon. 
Step 5. Enjoy your sparkle spoon! You can also apply ModPodge over the whole thing once you're done wrapping, to help it stay secure. I like to change out the tape on our spoons and make them customizable, so I don't ModPodge ours.


The first step to total breakfast awesomeness is rounding up all your ingredients. Without your ingredients you have nothing. Literally. You will have no oatmeal. And then you will be sad.

Pretty much what I have for you today is an adult version and a child's version of our "Best Bowl" of oatmeal. The child's version is sweet, packed with delicious, buttery cake flavor and pretty sprinkles... and, oh, chocolate chips, of course! The adult's version is savory and more complex. More "adult," if you will. We've got some herbs, some cheese, some salty, crispy pancetta and a perfectly crisp fried egg. With runny yolk. Because yum.


Prep and chop anything that needs prepped and chopped. Like my chives. My parmesan was already shredded for me, so I just got to plop it down on the board without doing any work. Which is amazing in the morning, before school. Quick and easy!


Then you can start assembling your oatmeal. The best part. Sprinkles! Sprinkles are the best part of anything, really. They add so much color and fun. This oatmeal was instantly transformed into a party in a bowl. Who doesn't want a party in a bowl, first thing in the morning?


Look at that. Who wouldn't want to eat that? I mean, really? It's pretty much every child's dream. You show this to any kid and just watch as their eyes light up and the saliva begins to pool. Hello, perfect (sweet) bowl of oatmeal!


Oh, and you... Look at you. With all your ooey gooey cheesyness, and your salty goodness and your crispy eggness. Take one bite of this and tell me it doesn't taste like something you'd find at a nice restaurant. It's oatmeal's older, more successful cousin that lives in the Hamptons. Sometimes it comes to visit for the holidays and other times it's just too caught up with work. And the stock market. And maybe you'll see it next year, or maybe you'll get a call on your birthday. Who knows.

There you have it, folks. Now that I've brought you my family's best bowls, it's time for you to share yours! Right now, Quaker® is having a "Bring Your Best Bowl" contest that ends on March 12th! You can win $250,000 and have your oatmeal created and sold in stores later this year! How awesome would that be? Make sure to ENTER, so you don't miss out on your chance to win!

------------------------------------------------------------------------


Birthday Cake Oatmeal:

Ingredients:
  • 1 package Quaker® Instant Oatmeal, Original flavor
  • 1/4 cup dry yellow cake mix
  • 2 teaspoons butter
  • 1/2 cup boiling water
  • 2 tablespoons hot milk
  • 1 tablespoon rainbow sprinkles, divided
  • 2 teaspoons mini chocolate chips, divided
Directions:

Place oatmeal, cake mix and butter in a small bowl, add water and stir well to combine. Set aside for 2 minutes. Stir in 2 teaspoons rainbow sprinkles and 1 teaspoon mini chocolate chips. Top oatmeal with remaining sprinkles and chocolate chips. Serve and enjoy!

------------------------------------------------------------------------

Parmesan Chive Oatmeal:

Ingredients:
  • 1 package Quaker® Instant Oatmeal, Original flavor
  • 1/4 cup shredded parmesan cheese
  • 1/2 cup boiling water
  • 1/8 teaspoon salt
  • 1/8 teaspoon pepper
  • 2 teaspoons chopped chives
  • 2 teaspoons pancetta, cooked until crisp
  • 1 fried egg
Directions:

Place oatmeal, parmesan cheese, salt & pepper and chives in a small bowl, add water and stir to combine. Top with crispy pancetta and a fried egg. Serve and enjoy!


Thursday, March 3, 2016

Sun-Dried Tomato Dip


When I dip, you dip, we dip.

There are few things that can make me "mmm" out loud, and dip is one of them. Especially this dip. If you're a fan of garlic and rich tomato-y goodess, and salty parmesan and creamy deliciousness then you're going to be in heaven when you taste it. There's so much going on, so many flavors, so many feelings surging through your body,.. but, somehow it just works so perfectly. Like most good dips. It tastes like something from your childhood, something new that you've just discovered and fallen in love with and something that you look forward to eating again very soon... all at the same time.


Over the last year I have come to really appreciate appetizers. For many of the celebrations we host at our house, we have been going full-app. Lots of finger foods, lots of dips, lots of things to nibble on. Sometimes it's better that way. Sometimes you just want to grab a little of this, a lot of that and a ton of dip.

For our next get-together I'm considering having a dip party and letting everyone bring a dip of their choice! I can just imagine all the different dips now... Yum! Okay, I'm definitely doing that. And if you end up doing that, too... You can make this Sun-Dried Tomato Dip! Perfect.


Sun-Dried Tomato Dip:

Ingredients:
  • 1/3 cup sun-dried tomatoes
  • 1/2 cup mayonnaise
  • 8 ounces cream cheese
  • 1/2 cup sour cream
  • 4 large basil leaves, torn
  • 5 garlic cloves, minced
  • 2 cups shredded Parmesan cheese


Directions:

Preheat oven to 350 degrees. 

Place sun-dried tomatoes and mayonnaise in food processor (or blender) and pulse until small chunks of the tomatoes can be found throughout the mayonnaise and the mixture has turned pink. Add in cream cheese and sour cream and pulse until well-mixed. Finally, add in the basil, garlic and parmesan and process until well combined. 

Spread mixture in a pie plate or baking dish of your choice and place in the oven for 30-40 minutes minutes or until edges are beginning to brown and dip is hot and gooey.

Top with basil and serve with sliced, toasted baguettes or crackers. 


Related Posts Plugin for WordPress, Blogger...