Showing posts with label cheese. Show all posts

Thursday, March 9, 2017

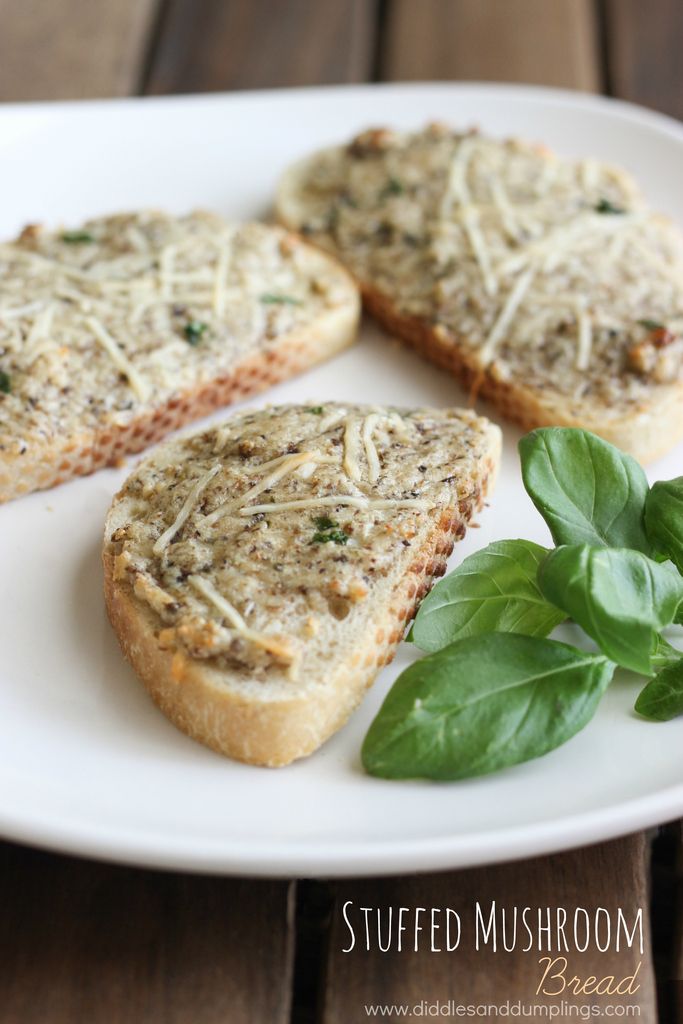
Stuffed Mushroom Bread


Carbs. Who doesn't love carbs? I mean, really? I would be so much better at doing a carb-only diet rather than a low-carb diet. Why doesn't that exist? Why can't they invent that? 

Give me all the carbs!
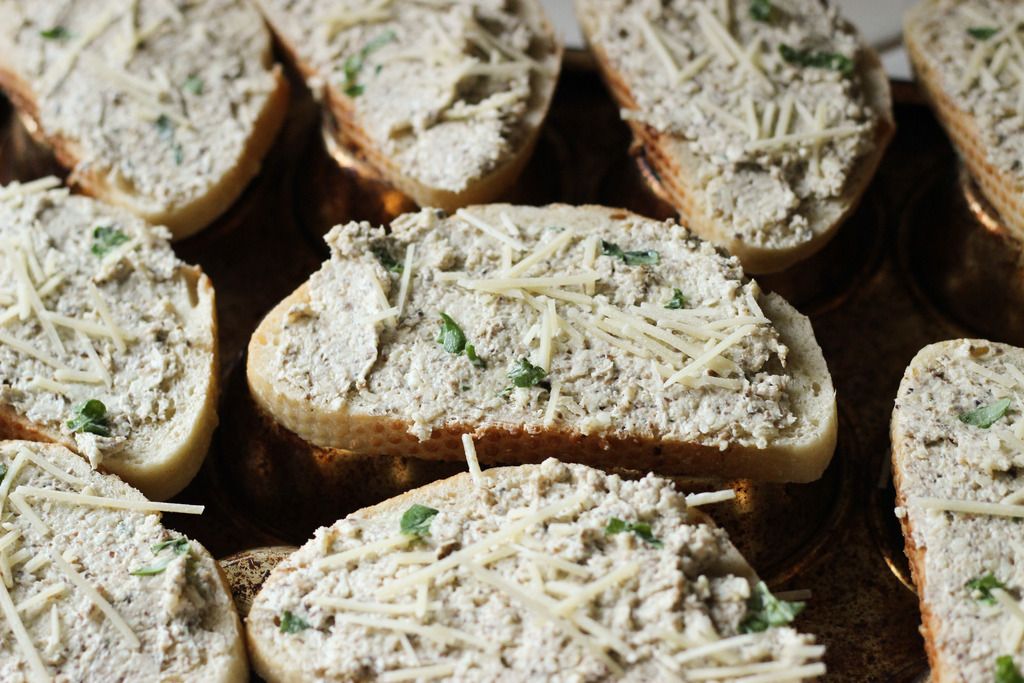

Whenever hubby and I do decide to cut carbs from our diet, it's bread that keeps calling to me and haunting my dreams. Warm, crusty, buttery bread. We've always had a very strong connection and we've always seen eye-to-eye. Bread just gets me. 

Know what the only thing better than bread is? Bread covered in ooey gooey cheese. It's true. It's a fact. And if you're a lover of stuffed mushrooms, you know, the ones filled with the most delicious garlicy, cheesy goodness, then you're probably going to faint when you try this recipe. 

Don't say I didn't warn you.
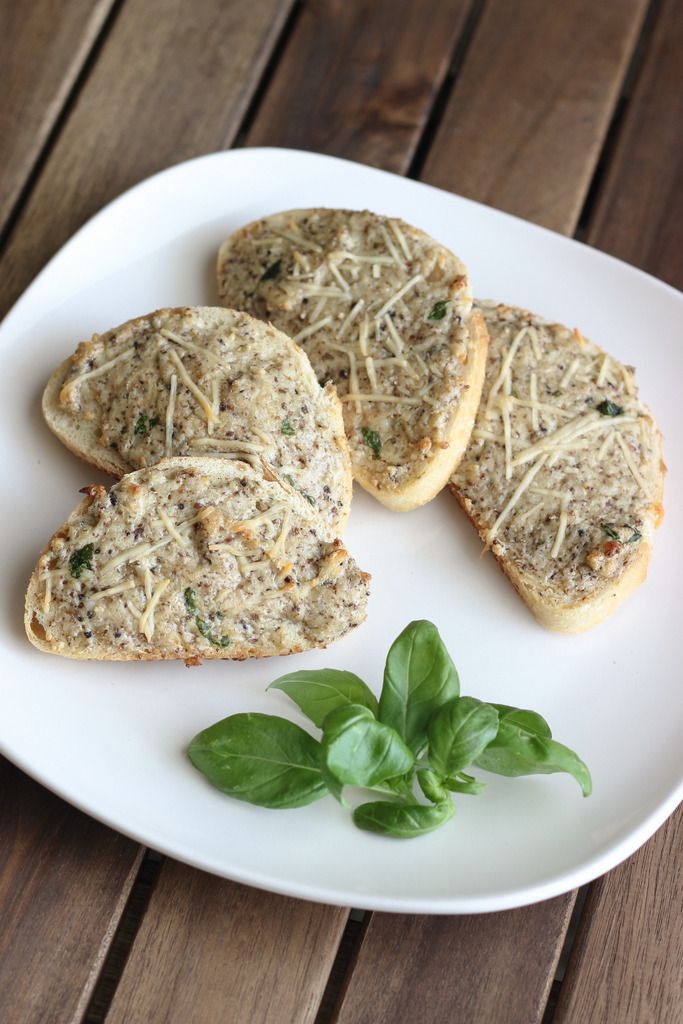

Also... make sure to try it with your spaghetti. Dip it in the sauce, drop some noodles on top... and be prepared for greatness. Or, try the spread over some grilled meat for a low-carb option. Toss it in the broiler for a couple minutes to melt the cheese and enjoy! Or just eat it by the spoonful, if you'd like. There's no wrong way to devour this cheesy spread of goodness.

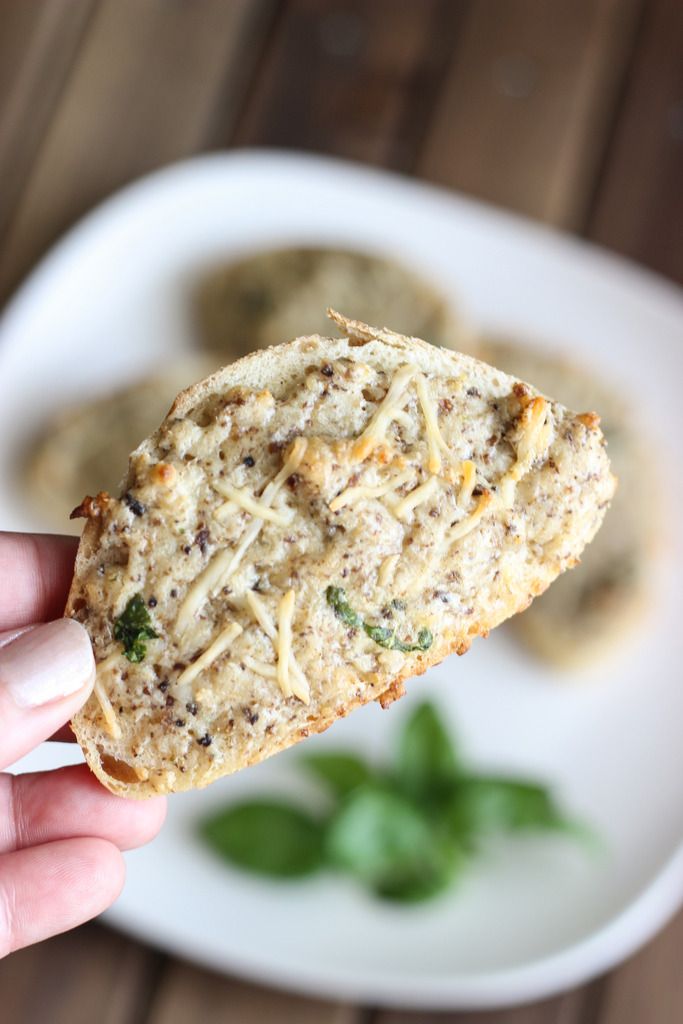
See those little brown flecks in the photo below? Those are mushroom bits. You're going to grow to love those adorable little brown speckles. 

Say hello to your new favorite way to eat a deconstructed stuffed mushroom!

Stuffed Mushroom Bread:

Ingredients:

1 small loaf Tuscan Bread - or any other crusty bread (mine was pre-sliced)
2 teaspoons olive oil
8oz container of sliced mushrooms
3 cloves garlic, minced
8oz cream cheese
2 tablespoons mayonnaise
2 tablespoons butter, room temperature
3/4 cup shredded mozzarella cheese
3/4 cup + 2 tablespoons shredded parmesan cheese
5 large basil leaves, torn

Directions:

Preheat oven to 325 degrees.

Place olive oil in a medium saucepan over medium heat. Toss in mushrooms and cook for about 15-20 minutes, or until mushrooms are a deep brown/golden brown color and starting to dry out just a little. Toss in garlic and cook for 1 minute longer. Remove from heat and set aside to cool slightly.

Pour mushrooms into food processor and pulse until they become very small chunks. Add in cream cheese, mayonnaise, butter, cheeses and basil and pulse until well combined. 

Spread mixture (about a tablespoon for small slices of bread, or 2 tablespoons for larger slices of bread) over your bread, sprinkle additional parmesan on top,  place on baking sheet and into oven for 18-20 minutes, or until bread is toasted and cheeses are melted and starting to turn golden. 

Remove from oven and serve immediately!


Saturday, January 17, 2015

Tuscan Turkey Melt


Let's be honest with each other for a minute here, okay? I make a lot of food and *most* of the food I make comes out really, really yummy and I'm usually very happy with it. Well, I'm not sure how to properly convey the message I'm wanting to convey here but I'll give it a try...

You. Have. To. Make. This. Sandwich.

Did you understand what I was trying to say there? I care about you deeply and I want only the best food for you... So, I need you to make this Tuscan Turkey Melt and then I need you to come back here and tell me how it made you feel afterward. I'm pretty sure this sandwich has changed my life and opened my eyes to a whole new world of sandwich-eating.


You see this? This is the beginning of a very beautiful sun-dried tomato sauce that is one of my favorite things EVER. I would eat this with a spoon if I could, but that would just be weird...


It becomes a very beautiful color once it's blended. See? How could you not want to eat it?


It's stacked with delicious herbed turkey and dry salami (placed beautifully by my darling husband!) Let's all give my hubby a hand for being such an amazing salami-placer. Great job, honey!


Now it's starting to look pretty...


Cheese! Lots o' cheese! This is a melt afterall, so we're going to need a whole lot of cheese.


Then, a little spinach... 


And roasted red bell peppers! My favorite. They're so beautiful, aren't they? I just love their vibrant color! They just scream "Look at me! I'm so pretty and you should devour me!"


And then... and then... the sauce. The SAUCE! Hands down the best part of the sandwich. I was tempted to just dump the whole thing of sauce on just one of the sandwiches but my hubby talked me out of it and brought me back to reality, where just because something is delicious, it doesn't mean you have to overdo it. Darn him and his wisdom.


Just looking at this picture, you know you're in for a treat. You know that there is no way this isn't going to be the best Tuscan Turkey Melt you've ever had. Or maybe even the best sandwich you've ever had *fingers crossed*. 

So, before you do anything else, put down whatever it is you're doing, go to the store and buy the ingredients for this sandwich. Then, at your earliest convenience, make this Tuscan Turkey Melt. Make it. Do it. Peer pressure!! You won't be sorry. Your tastebuds will thank you. All will be well in the world. Now, go!


Tuscan Turkey Melt:

Ingredients:
  • 4 slices sourdough bread 
  • 6 thick slices herbed deli turkey (we used a garlic herb turkey breast!)
  • 12 slices dried salami
  • 6 slices provolone cheese
  • 1 cup fresh spinach leaves
  • 1 red bell pepper, stem removed, halved and deseeded
  • 1 teaspoon olive oil
  • Sea salt


for the Sun-dried tomato sauce:
  • 5 sun-dried tomatoes (not packed in oil), chopped
  • 1/2 cup + 1 tablespoon mayonnaise
  • 1 large clove garlic, minced
  • 2 large basil leaves, torn in half


Directions:

Preheat oven to 425 degrees. Place bell pepper on a baking sheet, drizzle with olive oil and sprinkle with a little sea salt. Roast in oven, turning twice, for about 25-30 minutes, or until skin is charred and wrinkly. Remove from oven, place in ziptop bag and set aside for 10-15 minutes. Turn oven down to 400 degrees.

Place sun-dried tomatoes, mayonnaise, garlic and basil in a food processor and pulse until it becomes a pretty coral color, but there are still chunks of sun-dried tomato left. Set aside.

Butter one side of your sourdough bread and place it on a baking sheet. Repeat with other bread slices. Now, layer on the turkey, then the salami, then the provolone on two of the bread slices. Remove stems from the spinach and layer on top of the cheese.

Remove peppers from bag and remove skin, Cut pepper into 3 equal pieces and place over the spinach. 

Spread half of the sun-dried tomato mixture over the remaining bread (the non-buttered side!) Top sandwich with bread (butter side out!)

Place a heavy baking sheet over the top of the sandwiches and place in the oven. Bake for 18-20 minutes, check bread and make sure it's getting crispy, then remove the top baking sheet, crank oven to 475 degrees and bake for additional 5 minutes.

Remove from oven when bread is crispy and starting to brown and cheese is melty and delicious.

Cut sandwiches in half and serve right away to hungry family members.

Enjoy!

Makes 2 (large) sandwiches.


Sunday, February 16, 2014

#ChooseSmart Santa Fe Quesadillas with Sweet & Spicy Sour Cream


I am a member of the Collective Bias®  Social Fabric® Community.  This shop has been compensated as part of a social shopper amplification for Collective Bias and its advertiser.


Lunches. How do I even begin? Lunches for my daughter, lunches for my hubby and lunches for me... Trying to find the perfect non-turkey sandwich lunch can sometimes be a challenge. I know there are days when simply throwing some slices of turkey on some bread and smearing on a little mayo seems like the simplest and best option, but, really, you can only eat so many turkey sandwiches in a week. My family loves new and different things, for breakfast, for dinner and, yes, even for lunch, which is why I have decided to devote some of my time to thinking outside the box -- err lunch box, or lunch bag, that is. 

Ever since I was a young girl, my mom and I always made our weekly trips to Smart & Final. She always had the same list of items to buy: plastic cups, sodas, lunch meats, cheeses, frozen snacks/yummies, but then, of course, we always found other delicious items along the way -- frozen cheesecakes, cream puffs, you know, all that good stuff life has to offer. I always liked our trips to Smart & Final because it seemed so huge and there were so many things to buy. The shelves were packed full and almost to the ceiling and it made me feel tiny. It was impressive. It wasn't until I was much older and had a family of my own that I realized that the reason my mom went to Smart & Final wasn't because it had extremely high shelves, but because they carried such a wide variety of items to buy and had really, really great prices! You can find anything there, in large quantities, for an awesome price, and it's an overall great shopping experience!

That's why when #CollectiveBias gave me the opportunity to shop at Smart & Final for items to build a deliciously unique & different lunch, I jumped at it! I knew I exactly what I wanted to make -- Santa Fe Quesadillas -- so, I headed out to get the items I needed!


Cheeeeeese!! I needed Kraft Shredded Mexican Cheese, which happens to be part of the Kraft Buy 4, Save $4 deal going on at Smart & Final February 19 - March 4!

I also needed some Sour Cream, so I grabbed some Knudsen Sour Cream, which also happens to be a part of the Buy 4, Save $4!


The first, of many, new lunch recipes I will be developing begins with a cup of Knudsen sour cream, a little ground chipotle, sugar, salt and garlic powder. This is going to be your dip for your Santa  Fe Quesadillas!  I have to say... it's amazing. It goes well on tortilla chips as well, FYI ;)


Next, you combine your tomatoes & green chiles, corn, black beans, cilantro and lime. So colorful and so pretty!


Then comes my favorite part... the addition of the cheese! Place the mixture, along with a bunch of Kraft Shredded Mexican Cheese on half of a tortilla then fold it right on over...


Next, you get to get it all nice and crispy and golden! So pretty!


Then, you can sit back and admire your beautiful little quesadilla before you pack it up for your hubby or your kids for lunch. This is one brown bag lunch that you won't wanna miss... Luckily this recipe will make 4 quesadillas, so your whole family can indulge! Hope you and your family enjoy this fun and tasty deviation from the same old sandwich in a bag!


Santa Fe Quesadillas with Sweet & Spicy Sour Cream:

Ingredients:

  • 4 medium flour tortillas
  • 1/2 cup diced tomatoes & green chiles
  • 1/4 cup sweet kernel corn
  • 1/4 cup black beans
  • 1/4 cup chopped cilantro
  • 2 teaspoons lime juice
  • 1/4 teaspoon salt
  • 1-1/3 cup Kraft Shredded Mexican Cheese
  • Cooking spray


For the sour cream dip:

  • 1 cup Knudsen sour cream
  • 1 teaspoon ground chipotle powder
  • 1 teaspoon sugar
  • 1/4 teaspoon garlic powder
  • 1/4 teaspoon salt


Instructions:

In a small bowl, combine sour cream, chipotle powder, sugar, garlic powder and salt. Cover and place in fridge.

In a medium bowl, combine diced tomatoes & green chiles, corn, black beans, cilantro, lime juice and salt. Place 1/4 cup of the mixture on half of a tortilla and top with 1/3 cup cheese. Fold over the tortilla and set aside. Repeat with remaining tortillas.

Heat a griddle or frying pan over medium heat. Spray with cooking spray and place quesadilla flat on griddle. Cook about 2-3 minutes on each side, or until golden brown and crisp. Remove and cook remaining quesadillas. Cut in half, pack in aluminum foil or plastic container with lid, and assemble the rest of your lunch! (Don't forget the Sweet & Spicy sour cream!)


Find more recipes here: Smart and Final Social Circular: http://community.smartandfinal.com


Wednesday, January 8, 2014

Chicken Florentine Quesadillas


Is it just me, or are quesadillas absolutely amazing? There's something great about being able to stuff whatever you want into a tortilla, pile it with cheese, throw it in the oven and have a bunch of deliciously cheesy triangles of happiness. I have been on somewhat of a quesadilla kick here in our house lately and when I was asked to review the new I Can’t Believe It’s Not Butter!® Deliciously Simple™ spread, I knew I had to come up with a totally awesome quesadilla recipe to test it out... So, today I present to you -- Chicken Florentine Quesadillas! They're loaded with chicken, spinach, cheese, and a creamy garlic sauce! 


The new Deliciously Simple™ spread from ICBINB! comes packaged in a cute little green and yellow squared container, but don't let that adorable packaging fool you... what's inside is a fiercely delicious product that is 100% taste and 0% Artificial preservatives. It's made from simple ingredients that I can pronounce! Like non-fat yogurt and vegetable oil! Crazy, right? There's no long, complicated words that you can't understand... Score! 

The perfect beginning to my Chicken Florentine Quesadillas... Deliciously Simple™ and fresh garlic! No smell compares to fresh garlic simmering away... wouldn't you say? 


Next you add in your spinach, toss it around, cook it, and get it nice and wilty! Is wilty a word? Even if it's not... you definitely want it wilty. Then, when it's all wilty you add in some more Deliciously Simple™. Yay! 


The next part is my absolute favorite part... the addition of the cream! I'm a little bit of a cream freak nowadays... Thanks to Julia Child, I now feel like I should add cream to everything! So I do. I really do. The next time you're cooking something just throw in a little cream and I guarantee it will be even more delicious! Well, i'm sure some things wouldn't... but... you get the idea!


After you've simmered your cream and reduced it down to a perfectly creamy, flavorful, spinachy sauce, you'll want to spread it on your tortillas, top it with your sliced chicken and cover it in a ton of parmesan cheese. Cheese, delicious cheese! I honestly don't think I could live without cheese. It completes me.


The last step is just to plop it in the oven and bake it until it's nice and crispy! Easy peasy and completely amazing. I hope you love this recipe as much as we do! It's already on the lunch menu later this week! 

Our family just loves the Deliciously Simple™ spread from I Can’t Believe It’s Not Butter!® . The flavor is great, plus, no artificial preservatives? Can't beat it! Next i'll be using it to make some muffins for my daughter since she goes back to school soon! Love that it can be used for cooking and baking and I don't have to feel guilty about it ;) ! So, give it a try and let me know what you think!


Chicken Florentine Quesadillas: {Print Recipe}

Ingredients:
  • 2 large boneless skinless chicken breasts, cooked
  • 2-1/2 cups fresh spinach leaves, washed & drained well
  • 2 large cloves fresh garlic
  • 1/2 cup heavy whipping cream
  • 2 tablespoons I Can’t Believe It’s Not Butter!® Deliciously Simple™ spread, divided
  • 1 cup shredded parmesan cheese
  • 4 flour tortillas
  • Salt & pepper

Instructions:

Preheat oven to 375 degrees.

In a skillet over medium heat, melt 1 tablespoon Deliciously Simple™ spread. Add garlic and cook for 1 minute. Place spinach in the skillet and cook for 3-4 minutes, or until it's nice and wilty! Add in 1 more tablespoon of Deliciously Simple™ spread and 1/2 cup heavy cream. Season with salt and pepper (to your liking) and simmer for 4-5 minutes or until it has really thickened (you pretty much just want a creamy spinach, not a ton of extra sauce.)

Slice each chicken breast into 1/4" thick slices. Spread half of the spinach mixture on a tortilla, top with half of sliced chicken, 1/2 cup shredded parmesan cheese and another tortilla. Repeat with remaining 2 tortillas.

Place quesadillas on a baking sheet and into preheated oven. Bake for 8-10 minutes, or until cheese has melted and tortillas are crisp and slightly golden.

Cut quesadillas into triangles and serve. (I personally like to serve mine with a little greek yogurt!)


Disclosure: This post was sponsored by  I Can’t Believe It’s Not Butter® through their partnership with POPSUGAR. While I was compensated to write a post about I Can’t Believe It’s Not Butter® Deliciously Simple™, all opinions are my own.

Monday, February 25, 2013

Nacho Cheese


If I can just be honest here... I am completely addicted to cheese dip. I mean, completely addicted. If there's cheese dip around -- I will find it and I will consume most or all of it. Nacho cheese is my absolute weakness and one of my cravings during this pregnancy. I could seriously eat it all day, but luckily, I don't. My thighs wouldn't appreciate that. Plus, I don't want my baby coming out a beautiful shade of orange (can that happen?!).

Luckily, instead of spending $3 on the canned variety, I stumbled across a recipe for homemade nacho cheese sauce! It's made with REAL ingredients! Real ones!! Not those fake, non-real ingredients found in the other stuff! I made a big batch of it for the Oscar's last night using my Cabot Pepper Jack Cheese and it was unbelievable. So unbelievable, in fact, that if I kept eating it at the rate I was eating it, it would have been devoured within 15 minutes. I had to stop myself because I needed to have something to bring to the Oscar party...

All I can say is, If you're a cheese sauce fan like I am, you should make this. But be warned -- It's highly addictive and highly scrumptious.


Nacho Cheese Recipe: {Print Recipe}

Ingredients:
4 ounces Cabot Pepper Jack Cheese (shredded)
4 ounces sharp cheddar cheese (shredded)
1 tablespoon cornstarch
1 (12 ounce) can of evaporated milk
2 teaspoons hot sauce

Instructions:
In a medium saucepan, toss cheese with cornstarch. Add 1 cup of evaporated milk and hot sauce. Melt over medium-low heat, whisking often, until mixture is smooth and bubbly. Remove from heat and whisk in additional condensed milk until it reaches desired consistency.

Recipe yields 1-1/2 cups of sauce.

{Recipe adapted from Serious Eats.}


  photo SimpleSupperTuesday_zps93ff0e49.jpg“ />

Thursday, August 23, 2012

Chicken Parmesan Bake


Happy Thursday everybody! I can't believe it's already going to be Friday tomorrow! I'm so very, very excited because my daughter's teacher from last year asked me and one of the other moms to come help her out in her class tomorrow! She obviously missed our presence :). I have missed hers, too, actually, and am really looking forward to getting to spend a little time in a familiar classroom! Starting next week I will be working in my daughter's new classroom and getting to know her new teacher better, which should be fun, too!

This week has been really awesome because my daughter and I have been walking to school in the mornings! The weather has been so nice and luckily, for us, the route we take goes right through a park. It only takes us 10 minutes to get there and my daughter absolutely loves it! It definitely gets my morning off to a good start :).

This recipe i'm posting today is one that is perfect for a weeknight dinner and kids love it because it's simple and there's cheese involved! Gotta love cheesy recipes.


Chicken Parmesan Bake Recipe:   {Print Recipe}

Ingredients:

2 Large (or 3 medium) boneless, skinless chicken breasts
16 ounces spaghetti noodles (you could definitely use a different noodle!)
24 ounces spaghetti sauce
1/2 cup italian style bread crumbs
1/2 cup freshly grated parmesan cheese
1 cup grated mozzarella cheese
4 tablespoons butter *softened*
1 tablespoon italian seasoning
3 tablespoons freshly chopped parsley

Instructions:

Preheat oven to 350 degrees.

Season chicken breasts with salt, pepper and italian seasoning. Place in small baking dish and bake for approximately 40-50 minutes (or until juices run clear!)

Cook your pasta al dente (according to your package's directions), drain and mix in spaghetti sauce, salt and pepper.

Lightly grease a 9"x13" baking dish and pour spaghetti mixture in.

Slice chicken (against the grain) into 1/2" thick slices and place, side by side, over the top of the spaghetti.

Combine parmesan cheese and mozzarella cheese and sprinkle over chicken. Combine butter, breadcrumbs and salt and pepper and sprinkle over the cheese.

Bake at 350 degrees for 40-45 minutes, or until cheese is bubbly and breadcrumbs are brown and toasty.

Sprinkle fresh parsley over the top and serve!


GBPRecipeRoundUp 
Related Posts Plugin for WordPress, Blogger...