Showing posts with label dinner. Show all posts

Thursday, January 14, 2016

Crock Pot Pulled Pork


If you remember last week's recipe, it was a delicious Brown Butter Cheese Sauce that would knock your socks off, and in the post I talked about some amazing Crock Pot Pulled Pork that pairs perfectly with said cheese sauce. Well, today, is your lucky day... The pork recipe is finally yours. 

Over the years my hubby and I have tried so many pulled pork recipes and we were never truly satisfied with any of them. That is, until we discovered a little secret. Do you want to know what that secret is? I don't know if you can handle it. It's a pretty big deal...


Okay, I'll tell you... But, only because I know that you can handle it. The secret to truly perfect pulled pork is pork ribs. Have you tried it? If you're sitting there saying to yourself "Duh! I've done that for years..." Then, you, sir or madam are inspiring and I tip my hat to you. If you're sitting there thinking "What madness is this?? You're crazy!" then I strongly urge you to try it immediately. The difference between using pork roasts and pork ribs is one that can only be described as monumental. The flavor is richer, porkier and so much more satisfying than anything you've tried before. 

Also, it goes perfectly over baked potatoes. With brown butter cheese sauce. And extra cheese. And BACON. And some chives or green onions to finish it off. {Don't forget the sour cream!}

So, instead of taking up more of your precious time talking about how your life will never be the same after you try this recipe and how you'll wish you could turn back the clock and get back all those precious years where you didn't have this delicious pork in your life... I'll just hand over the recipe ;)


Crock Pot Pulled Pork:
Ingredients:
  • 3 pounds country pork ribs (it's perfectly fine if they have bones -- you can remove them after they cook!)
  • 1/4 teaspoon cayenne
  • 1/2 teaspoon pepper
  • 1/2 teaspoon salt
  • 1/2 cup beef broth
  • 1/2 cup cola soda
  • 1 cup sweet barbecue sauce (we use Sweet Baby Ray's original)
Directions:

Place pork in slow cooker and season with salt, pepper and cayenne. Pour in cola and beef broth. Cook on low setting for 7 hours, or until meat is tender and shreds easily. Remove meat, discard bones and excess liquid, shred meat and return to slow cooker. Add in your barbecue sauce, mix well and allow it to cook on low for an additional hour.

Serve it on rolls, over a baked potato, in a casserole, or whatever you choose! It's good no matter what you do with it! Enjoy!


Wednesday, January 21, 2015

Creamy Tomato, Sausage & Tortellini Soup


I'm going to be honest here and admit something... I'm not really a "soup person." There, I said it. Everyone always goes on and on about how chicken noodle soup is the most comforting food of all and I just sit there shaking my head, in my head. I don't actually shake my head physically... just mentally. I mentally shake my head. 

Maybe I should be a little more specific here... it's mostly broth-based soups that I'm not a huge fan of, I guess. I do love a good creamy soup from time to time! Loaded potato soup, chicken & corn chowder... well, those are okay in my book. 

Oh, and did I mention Creamy tomato soups? I do love those, too. Okay, so maybe I do like soup. Just not all soup. Maybe it's chicken noodle I have something against? 

The one thing I can be certain of is that this Creamy Tomato, Sausage & Tortellini soup I'm sharing with you today is my favorite soup. That's a fact. And the picture above is my favorite picture of it. I feel like it really captures the true essence of this soup and who or what it is, as a soup. Okay, that sounded a little rehearsed, didn't it? And it didn't really make sense, did it? Okay, I'll stop now...


Let me just say that I really, really love the colors in this soup! I'm finding that as I age it becomes more and more important to me to have a variety of colors in whatever it is I'm eating. I love the yellow from the bell pepper, the red from the sun-dried tomatoes and the green from the spinach! So pretty and so fresh looking.


I could eat this soup every day if I had to. Maybe it's the sausage, maybe it's the tortellini, maybe it's the delicious creamy tomato-y ness... or maybe it's a combination of them all. Whatever it is, this soup is killer. My hubby's favorite part was the sausage nuggets that he said were "just the right size." When you come across one it's like finding a little ball of treasure. See? Eating soup can be fun!


Okay, so I've just convinced myself that soup is a wonderful thing. I know you guys were already a step ahead of me and you were probably shaking your head in disbelief when you read my first paragraph, but, don't worry, I'm with you now. We're on the same page. Now, just go make the soup and we'll forget about this whole thing...


Creamy Tomato, Sausage & Tortellini Soup:

Ingredients:
  • 24 ounces tomato sauce
  • 3 cups half and half
  • 2 cups chicken broth
  • 1 pound sweet italian sausage
  • 9oz package cheese tortellini
  • 1 teaspoon dried italian seasoning
  • 1 teaspoon dried basil
  • 1/2 teaspoon black pepper
  • 1 teaspoon white sugar
  • 2 teaspoons lemon juice
  • 1 medium yellow pepper, sliced
  • 1/2 onion, diced
  • 2 cloves garlic, minced
  • 1/2 cup diced sun-dried tomatoes
  • 2 cups fresh spinach, chopped
  • 1/2 cup shredded parmesan cheese
  • fresh parsley, chopped
  • 1 tablespoon olive oil

Directions:

Roll sausage into small balls, or "nuggets" about the size of a quarter and place in a skillet over medium heat. Cook until no longer pink.

Meanwhile, in a dutch oven, over medium heat, place olive oil, onions, garlic and bell pepper. Cook until bell pepper begins to soften, about 4-5 minutes. Pour in tomato sauce, add sugar, lemon juice, pepper, basil and italian seasoning and allow it to simmer for about 5 minutes. Add chicken broth, half and half, sun-dried tomatoes and cooked sausage. Bring to a boil and allow soup to cook for 5 more minutes, then, add in your tortellini and cook according to package directions (mine was 8 minutes). Stir in spinach during last 2 minutes of cook time.

Top soup with shredded parmesan cheese and a little fresh parsley and serve!

Enjoy!

Friday, November 21, 2014

Shredded Cilantro Lime Chicken


Sometimes you want to take 4 hours to prepare a gourmet meal, complete with fancy little Hors d'oeuvres and champagne poached quail eggs over smoked ahi tuna (okay so I don't know if that's actually a thing) and sometimes... well, sometimes you just want to throw together a really easy dinner, like burritos or tacos. To be honest, most of the time I choose the latter, especially now that I have an 18-month-old son that constantly keeps me on my toes. The easier the dish is to prepare, the better. That means I will have more time to chase him down and remove the bits of crayon and couch-aged crackers from his slobbery little mouth. 

Yesterday was one of those days where by the end of the night my body felt like it had forgotten how to function properly and everything was set to auto-pilot. No longer was I the same woman I was when I opened my eyes that morning. Throughout the day I had become a shell of my former self, and had repeated the words "No, baby... No, baby..." about thirty dozen times... and that's no exaggeration.  

Today I woke up feeling refreshed and ready for the day... Now, almost 8 hours later, I feel beaten down and so, so ready for bed! In order to to end this post on a positive note and forget the fact that I am in desperate need of a vacation, I would just like to say... make this chicken, eat it and just enjoy life! It's perfect for burritos, tacos, taco salads or anything else you might be able to dream up! 

Leave me a comment below and let me know what you used it for! :)

-------------------------------------------------------------------


Shredded Cilantro Lime Chicken:

Ingredients:
  • 3 large boneless, skinless chicken breasts
  • 2 teaspoons olive oil
  • 2-1/2 teaspoons chili powder, divided
  • 2 teaspoons salt
  • 1-1/2 teaspoons black pepper
  • 1-1/2 tablespoons lime juice
  • 1/2 cup chopped cilantro
Directions:

Preheat oven to 375 degrees. Pat chicken breasts dry and rub with olive oil. If the breasts are super thick you can pound them out until they are all even in thickness. Sprinkle with 2 teaspoons of the chili powder, the salt and the pepper, place on baking sheet (or baking dish) and cover with foil.


Bake chicken breasts for 20-30 minutes, depending on the thickness. Once juices run clear and meat is no longer pink, remove from the oven and shred. Sprinkle with additional 1 teaspoon chili powder, lime juice and cilantro and mix well.

This chicken is perfect for burritos, tacos, taquitos or even by itself!

Makes about 2-1/2 cups shredded chicken.


Tuesday, September 16, 2014

Orange Glazed Pork Tenderloin


Fall is so close I can almost touch it. I've been spending this last week mostly indoors, with the a/c on, pretending it's already here. The skies have been grey this week and one day we even got a slight drizzle of rain. It may have only lasted for a minute or two, but it was something. 

My daughter and hubby spent last night talking about all the wonderful times we have ahead of us in the coming months. The beginning of October is truly a special time for us, as it's the beginning of our favorite time of the year! Fall festivals, leaf piles, apple cider... quickly followed by Christmas songs, cookie decorating, and the smell of wood burning filling the air. It's a magical time.

One of our favorite parts of Fall is all the delicious, comforting Fall recipes. I notice in the colder months we tend to cook mostly with pork, and most of our dishes include a sweet & savory combination. We make constant jokes about having "pork chops with a nice thweet thauth" for dinner because the truth is, that's mostly what we eat. 

Which brings us to today's recipe... That worked out perfectly, didn't it?


Today's recipe is an amazingly tender, moist, savory & sweet Orange Glazed Pork Tenderloin. Did I mention that there are only 5 ingredients?? It's the perfect dish for cooler months, once the leaves start changing and things feel okay in the world again. Once the Summer is gone for good and there is no fear of another 100 degree day rearing it's ugly head. Ahhh yes... those days are the days when you want to make a recipe like this.

Basically you're going to take your pork tenderloin, rub it with salt and pepper and roast it. Roast it until just before it hits the perfect internal temperature... once it hits about 130 degrees.


Then, you slather on a perfectly sweet (with just a hint of spice!) orange glaze and let that roast for about another 5 or 6 minutes.


Then, you serve it up with a little rice, some veggies and love. Lots of love. You can't serve comfort food without love, can you?

This dish is great for busy weeknights because it's so easy to prepare! It would be wonderful to serve at a Fall dinner party or even just for some close friends due to the sheer deliciousness and ease of preparation! It just tastes fancy.

I hope you enjoy it as much as we did! 

---------------------------------------------------------

Orange Glazed Pork Tenderloin:

Ingredients:
  • 2 pound pork tenderloin
  • 1 cup orange marmalade
  • 1 teaspoon soy sauce
  • 1 teaspoon rice vinegar
  • 1/2 teaspoon chili flakes
  • Salt & pepper


Directions:

Preheat oven to 400 degrees. Season tenderloin with 1/3 teaspoon pepper and 1/2 teaspoon salt and place on a baking sheet lined with aluminum foil. 

In a small bowl, combine marmalade, soy sauce, vinegar and chili flakes, then set aside.

Roast tenderloin until internal temperature reaches about 130 degrees, then spoon orange glaze all over the top of the tenderloin. Return to oven and roast until internal temperature reaches 145 degrees.

Remove from oven and allow tenderloin to rest for 5 minutes before slicing.

Serve sliced tenderloin on top of rice, alongside your favorite veggie!


Tuesday, May 20, 2014

Creamy Mushroom Basil Tortellini


I'm a bit of a pasta freak... 6/7 nights a week, if you were to ask me what I wanted for dinner, it would involve pasta. And cream. Creamy pasta, to be exact. I could live on pasta, especially tortellinis. Cheese filled ones... ohhh yes! okay, i'm done.

Let me go on to say that this creamy parmesan basil tortellini with mushrooms is one of the best pasta dishes i've ever had. Hubby agreed! Daughter probably would have, too, but she was already asleep when we ate. Yes, we eat dinner late sometimes... it's kind of our thing. Hubby and I love cooking dinners together on the weekends and we usually end up eating around 9 or so. It's one of my favorite parts of the weekend! 

If you love french and italian food, this pasta is definitely for you. It's almost an infusion... Frenchtalian. Yes. That's what it is... 


It's one of the creamiest, most flavorful pastas on the planet and it you would be doing a great thing for your family by making it for them for dinner tonight. Or tomorrow... but definitely this week!


I ended up frying up a rib eye steak and serving some slices of it right on top of the pasta, just because. It felt right. No other explanation needed, right? It would also be amazing with some blackened or even roasted chicken on top! Yum.


Creamy Parmesan Basil Tortellini with Mushrooms:

Ingredients:
  • 10 ounces baby bella mushrooms, diced
  • 1 yellow onion, diced
  • 4 cloves garlic, minced
  • 2 tablespoons flour
  • 2/3 cup dry white wine
  • 2 cups chicken broth
  • 1 cup heavy cream
  • 2 egg yolks
  • 1/2 cup shredded parmesan cheese
  • 1/4 cup freshly chopped basil
  • 2 teaspoons lemon juice
  • 1/2 teaspoon pepper
  • 1/2 teaspoon salt
  • 1 (20 ounce) package 3 cheese tortellini
  • 2 tablespoons butter
  • 1 tablespoon olive oil


Directions:

In a large dutch oven, melt/heat butter and oil over medium heat. Add onion and garlic and cook until translucent, about 4 minutes. Add mushrooms and cook until they darken and release their juices, about 5-6 minutes. Add flour, stir and combine, and cook for about 2 minutes. Pour wine into mushrooms, while stirring, and allow it to thicken, about 3 minutes. Once thick, add chicken broth, bring to a boil, and cook for 15-20 minutes, or until liquid has significantly reduced and thickened. 

Cook tortellini according to package directions, drain and set aside.

In a small bowl, combine heavy cream and egg yolks. Pour a small amount of hot cooking liquid into the cream/egg mixture, and whisk. Don't stop whisking! Once mixture has been tempered, pour into dutch oven and mix well! Cook for about 2 minutes, then stir in parmesan cheese, lemon juice, basil, and salt & pepper. Turn off your flame and adjust seasonings as needed. 

Mix tortellini into sauce and serve to hungry family members who have been waiting patiently and drooling as the smell of this delicious dinner wafted through the house while you were preparing it.


Monday, November 25, 2013

Cheesy JalapeƱo Hashbrown Ravioli and Roasted Garlic Chicken with #OreIdaHashbrn


I am a member of the Collective Bias®  Social Fabric® Community.  This shop has been compensated as part of a social shopper amplification for Collective Bias and its advertiser.

What can I say about hash browns other than they are a marvelous creation. I love, love, love delicious, crispy hash browns for breakfast and couldn't imagine life without them. In my extremely humble and valuable opinion, the only thing that could be better than hash browns for breakfast is hash browns for dinner. But not just any hash browns... Oh, no... It has to be a unique, yet delicious take on hash browns that found my husband and I delightfully pleased... Hash brown filled raviolis. Sounds crazy, right? Well, it is... kind of. But, it's a delicious kind of crazy like you can only believe once you've tasted it. 


Of course, before I could head into the kitchen and become like a mad scientist in his laboratory, I had to head out and gather my supplies. I also needed to grab a few Christmas gifts for my kids, so I needed a one-stop-shopping place like my local Walmart. I love the shopping at Walmart because I love the convenience of being able to grab some toothpaste, artichokes, underwear and a fishing pole if I needed to. It's kind of my thing... 


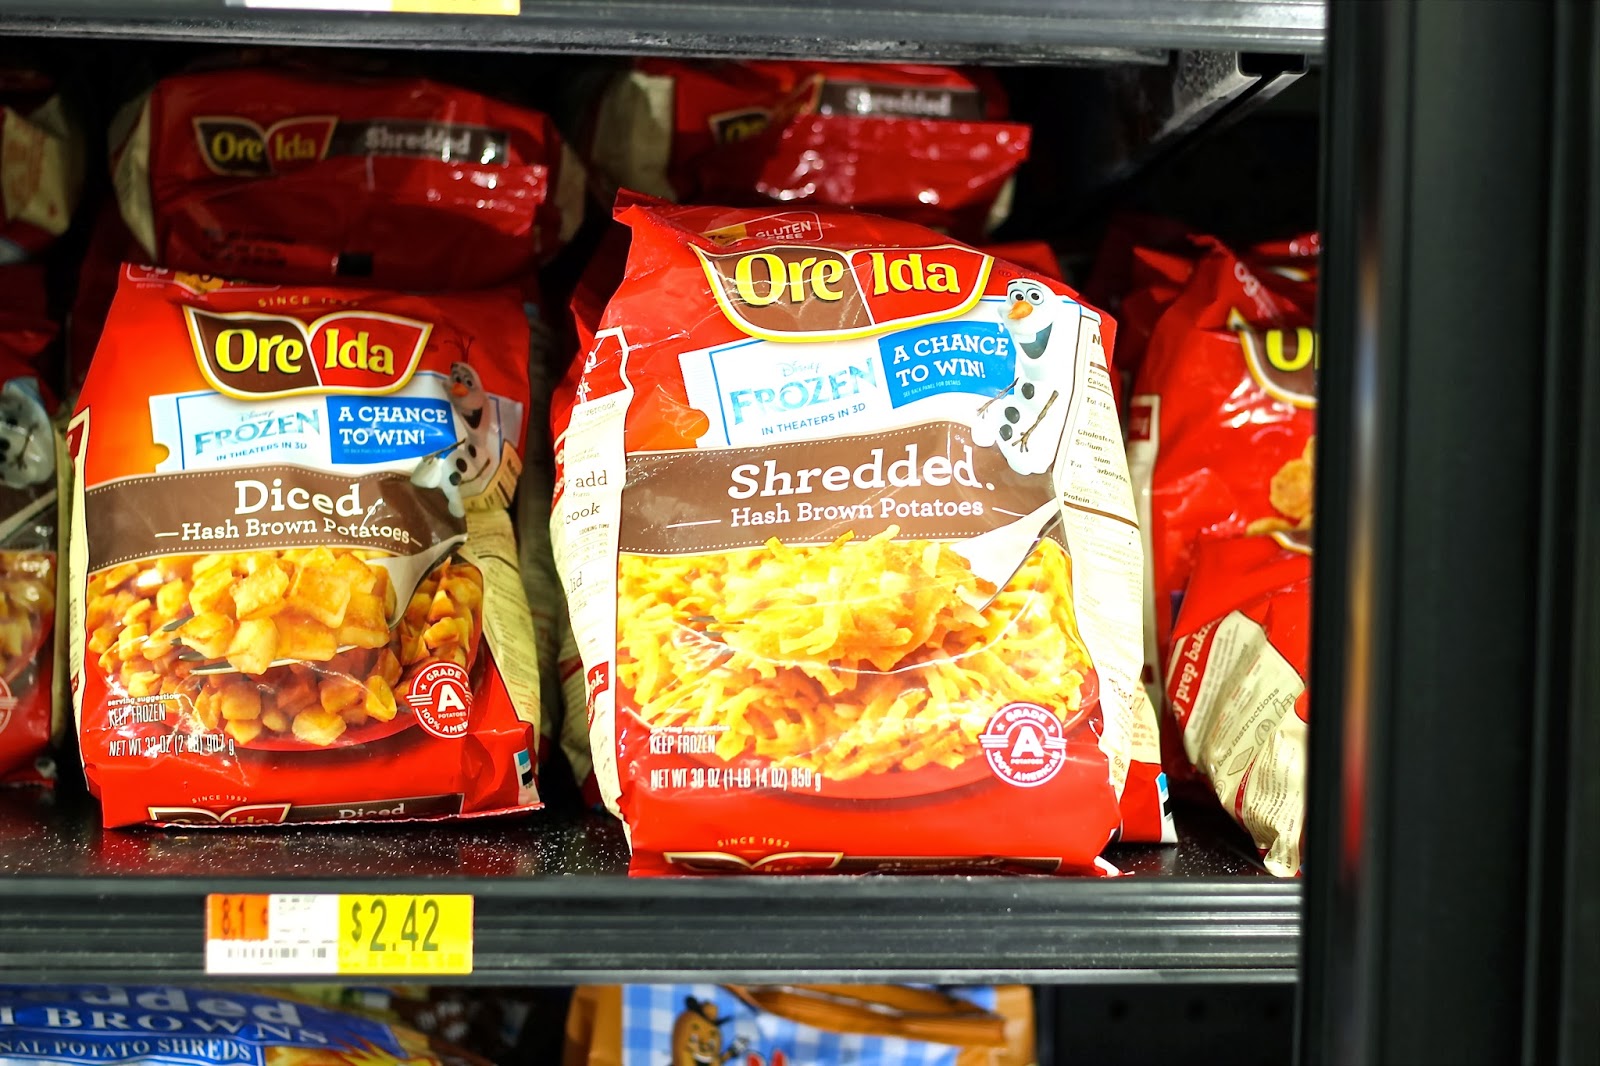
When I headed to the freezer section, I noticed that the Ore Ida Hash browns' packaging was decorated with cuteness from the new movie Frozen that's coming out this month! We are so excited for this movie and my 7-year-old daughter has been begging us to take her to see it. So, of course she was pretty excited when she saw the Frozen packaging. I also found out that Walmart is going to have in-store demos at some of their stores on November 30th and December 1st! Love it! Plus, there's a Disney's Frozen Giveaway going on right now and you can win a bunch of super cool prizes! Now, who doesn't love prizes? I'm a sucker for giveaways and prizes. 


Remember a few weeks ago when I told you I was going to be using Won Ton wrappers again, very soon? Well, I did. I used them again and I'm still in love with them! Yes, I could have spent a long time making homemade pasta dough and yes it would have been delicious... but, I was really curious how the Won Ton wrappers would work for raviolis!


... Perfect. They worked flawlessly! So easy, so fun and so delicious! You should definitely try this out if you're a fan of Ore Ida's awesome hash browns. 


Cheesy JalapeƱo Hashbrown Ravioli and Roasted Garlic Chicken:

Ingredients:

Ravioli:
  • 4 cups frozen Ore Ida Shredded hash brown potatoes
  • tsp salt
  • tsp pepper
  • 4 tablespoons butter
  • 1/2 onion, minced
  • 1/3 cup chopped jalapeƱo (I used canned!)
  • 1-1/2 cups shredded sharp cheddar cheese
  • 1 egg yolk
  • 48 won ton wrappers
Cheese sauce:
  • 4 tablespoons butter
  • 1/4 cup flour
  • 2 cups milk
  • 3/4 teaspoon salt
  • 1 teaspoon pepper
  • Pinch of nutmeg
  • 1 teaspoon hot pepper sauce (or you can adjust to your liking!)
  • 3 tablespoons chopped jalapeno (canned again!)
  • 2 cups shredded sharp cheddar cheese
Chicken:
  • 4 boneless, skinless chicken breasts
  • 12 whole garlic cloves, crushed
  • Salt & pepper
  • Olive oil
Instructions:

Preheat oven to 375 degrees. Place chicken breasts on a baking sheet, place 3 cloves of crushed garlic on each breast, drizzle with olive oil and season with salt and pepper. Place in oven for 35-45 minutes, or until chicken is tender and juices run clear.

While chicken is roasting, in a skillet over medium heat, heat 1 tablespoon oil and 1 tablespoon butter. Saute onion for 3-4 minutes, or until soft. Add remaining butter, melt, then add hash browns. Season hash browns with salt and pepper and cook for 8-10 minutes, or until potatoes are cooked (not crispy.) Remove from heat, add jalapeƱo and egg yolk and mix well. Allow mixture to cool, then stir in shredded cheese.

Place 1 tablespoon of hash brown mixture in the center of a won ton wrapper. Wet the edges of the wrapper by rubbing a little water on them, place another won ton wrapper on top and seal edges. Repeat with remaining wrappers. 

In a medium saucepan, melt 4 tablespoons butter and whisk in flour. Cook for 1 minute. Whisk in milk, making sure there are no lumps. Season with salt, pepper and nutmeg and bring mixture to a boil. Allow to cook for about 1-2 minutes, or until mixture is thick. Remove from heat and stir in shredded cheese.

Bring a large pot of water to a boil and sprinkle in a little salt. Cook raviolis for 2-3 minutes, or until they are soft, but not gummy. Drain well and toss raviolis with cheese sauce. 

Slice chicken chicken breast into thin slices and serve with raviolis. Make sure to place some of that roasted garlic on top! Yum. 

Serves 4.

Monday, July 22, 2013

Creamy Coconut Chicken Curry


Back when I was pregnant and the only thing that sounded good to me was a gigantic, greasy, bacon covered burger, my darling husband asked me to make a chicken curry dish. I really, really didn't want to make a chicken curry dish, but because I love him and because he's so adorable and persuasive, I made it for him. I had absolutely no idea that it was going to become one of my favorite dinners and something I found myself craving pretty much every other day.

Over the years my hubby has really been the person who has shaped my food tastes. He's the one who's always trying to get me to try new things and introducing me to fun, new foods. He helps me step out of my comfort zone and I love him for that! I guess that's what husbands are for, right? They're there to fill in the places in your life where you may be lacking. Thanks, hubby! Oh, and I should probably thank him for talking me into cooking this delicious dinner for him as well... You'll thank him, too once you try it!


Creamy Coconut Chicken Curry Recipe (adapted from The Joys of Life) : {Print Recipe}

Ingredients:
3 boneless, skinless chicken breast pieces
1 large onion (cut into 3/4" pieces)
2 garlic cloves (minced)
1-1/2 teaspoons ground cumin
1 rounded teaspoon ground turmeric
1 rounded teaspoon ground coriander
1 pinch of ground ginger
1 tablespoon cooking sherry
1 tablespoon brown sugar
1 (15 ounce) can coconut milk 
1-1/2 teaspoons corn starch
1 cup chopped tomatoes (canned)
2 teaspoons fresh lemon juice
salt
2 tablespoons fresh cilantro (chopped)
2 tablespoons oil

Instructions:

Cut chicken into 1" pieces. Heat 1 tablespoon oil in a large pot or dutch oven. Brown and cook chicken over medium heat. Set aside. Add 1 tablespoon of oil and saute onions for 4-5 minutes. 

Add cooking sherry, garlic, turmeric, coriander and ginger. Cook for one minute

Add chicken back to pot. Mix corn starch with coconut milk. Add coconut milk, brown sugar and tomatoes and cook, partially covered for 15 minutes, or until sauce has thickened. 

Stir in lemon juice. Taste and season with salt and pepper as desired.

Serve over rice (we used brown rice, but you can also use yellow, white or any style rice.)

Sprinkle with chopped cilantro and serve.


Tuesday, July 16, 2013

Chicken Alfredo Flatbread


So, on Saturday Night... after our daughter was in bed, hubby and I decided to make something fun and new. I was super excited because we were going to whip up a batch of homemade flatbread, which is something I've never made before, but something that I absolutely love eating when we go to restaurants!

One of my favorite things about my dear, sweet husband is how much he loves to come in the kitchen and help me cook. We like to make a night of it and treat it as almost an "at-home date night." They are actually my favorite nights. I'll take cooking with him over sitting at a restaurant any day! Especially when we're making something yummy like Chicken Alfredo Flatbread! 

The best way I can describe this recipe is... Mega Super Crazy Delicious. Yeah, that's the best way to describe it for sure. I think homemade flatbread is going to be my latest addiction because I'm already wanting to make it again! Plus, the roasted mushrooms, tomatoes, bell pepper and garlic are out-of-this-world amazing. I hope you like it as much as we did!


Chicken Alfredo Flatbread Recipe: {Print Recipe}

Ingredients:
2 boneless, skinless chicken breasts (cooked and sliced)
4, 10" flatbreads *recipe below*
1 cup alfredo sauce
8 ounces fresh mushrooms
1 red bell pepper
10 ounces cherry tomatoes
3 cloves fresh garlic (minced)
8 ounces fresh mozzarella (sliced)
12 fresh basil leaves
Olive oil

Instructions:
Preheat oven to 425 degrees.

Spread mushrooms and minced garlic on a greased baking sheet.
Cut tomatoes and bell pepper in half, remove seeds from bell pepper and place on baking sheet. Roast in preheated oven for 14-15 minutes, or until bell pepper is beginning to char slightly and tomatoes have softened. Remove from oven, slice bell pepper into strips and set aside. Do not turn off the oven.

Spread about 3 tablespoons of alfredo sauce on each flatbread. Place about 4 slices of chicken breast on top and 1/4 of the tomatoes, mushrooms and bell peppers. Place 1/4 of the fresh mozzarella on each flatbread and top with a couple fresh basil leaves.

Place in oven and cook for 8-12 minutes, or until flatbread is crispy and cheese is nice and melty.

Flatbread Recipe (from Food Network)
1 package active dry yeast
1/2 teaspoon sugar
1-3/4 cups all purpose flour
1 teaspoon salt
3/4 cup water
oil

Combine yeast, salt, flour and sugar in a food processor. Pulse to combine. Slowly pour in water, while pulsing, until dough forms a ball. Remove from food processor and knead about 5-6 times, or until dough is smooth.

Place in an oiled bowl, cover with a towel and place in a warm area to rise.

Once dough has doubled in size, divide into 4 pieces. Roll each piece into a ball and use a lightly greased rolling pin to roll dough out into a 10" piece. 

Place dough on a griddle over medium heat. Once dough is beginning to bubble on the top and the underside is beginning to brown, flip. Repeat on other side. 


Friday, April 8, 2011

Teriyaki Chicken & Fried Rice


The first time I made this meal something changed inside me. I knew immediately that you truly could make the most delicious tasting food at home and that it wasn't very hard. This is one of those meals that I know my daughter will remember when she's all grown up and has a family of her own. It's just that good. When you make this and serve it to your family try not to be surprised when they eat every last piece of chicken and tell you how much they love you and that you're the best wife and mother on the planet. If this sounds good to you then I suggest you give it a try!

Teriyaki Chicken Recipe:   {Print Recipe}

Ingredients:
1/2 cup sugar
1/2 cup brown sugar
1 cup soy sauce
1/2 cup apple cider vinegar
2 teaspoons freshly grated ginger
3 cloves of garlic (minced)
1/2 teaspoon pepper
2 tablespoons cornstarch
2 tablespoons cold water

10-12 chicken thighs (There are a couple of different combinations you can do here - it just depends on your preference: boneless/skinless, bone-in/skin on, boneless/skin-on, bone-in/skinless. I personally have tried them all and I prefer to use bonless/skin-on)

Instructions:
First you'll need to put your chicken in a big pan. I use a large lasagna pan.

Next, combine the cornstarch and cold water in a small bowl and set it aside. Place all of your ingredients for the sauce into a medium saucepan, along with the cornstarch/water mixture. Cook on medium-high heat for about 5-6 minutes (or until it just starts to thicken and bubble). Let the sauce cool down, then pour it over the chicken. Cover the chicken and place in the fridge until it's time to start cooking it (You can definitely skip this step! Most of the time, if i'm in a hurry, I don't refrigerate it).

Preheat your oven to 425 degrees. Place your chicken in the oven for 50-60 minutes, flipping it over after 30 minutes. Oh, and I like to baste the sauce over the chicken every 20 minutes to keep it nice and juicy and saucy!


Chinese Fried Rice Recipe:   {Print Recipe}

Ingredients:
4 cups of cold, cooked white rice (I usually cook my rice earlier in the day and put it in the fridge until it's time to use it!)
2 tablespoons of oil
2 eggs
2 cups of cooked peas/carrots (I use the frozen pea/carrot mixture)
3-4 stalks of green onion (sliced)
Approximately 1/2 cup soy sauce (more or less to taste)
2 teaspoons sesame oil

Instructions:
Heat 1 tablespoon of oil in a frying pan over medium heat.

Break 2 eggs into pan and scramble them around for 1 minute.

Once the eggs are cooked, add remaining tablespoon of oil, heat, and dump in the peas/carrots and rice. Mix it around with the spatula until there are no clumps of rice and allow it to cook while you stir it for 2-3 minutes.

Pour in sesame oil and soy sauce and continue to mix it until the rice is evenly colored and no white grains of rice remain.

Throw in the green onion and stir ir around for 1 minute and then you're done!
Related Posts Plugin for WordPress, Blogger...